Customizing the Design
The kayak design can be customized in a number of ways to fine-tune
it to the paddler's preferences. These adjustments are optional.
The design as provided is applicable to a wide range of paddlers.
However, if you're a person who likes to tinker, these settings
are available to the builder who wants to make the final tweaks
to the design.
The following adjustments can be made prior to printing the forms:
- The size and shape of the cockpit
- The target displacement based on the weight of the kayak, cargo,
and paddler
- The design waterline (DWL) height to equalize design/target displacements
- The location of the paddler's center of gravity (CG)
The Customization Process
If you're unfamiliar with the KayakFoundry software, here's an
description of how to customize the design. The order of customization
listed is more fine-grained the further you go down the list. The
first adjustment is the cockpit size, and you may choose to make
that change and stop there. Or, you can continue down the list to
make additional changes. The choice is up to you.
| Install the KayakFoundry
software on your computer. The software is distributed in
a zip file, and installation is as simple as unzipping the file
to a location on your hard disk. |
|
| Run kfoundry.exe,
select File|Open
and choose the design .yak
file. The design will open and will be displayed in a number
of views. |
|
| The top panel is the Plan view and shows the kayak
from a birdseye view. Click in this panel, and three control
points will be displayed in green. The one on the centerline
allows you to adjust the length of the cockpit. The remaining
two allow you to adjust the curvature and width of the cockpit.
Click and drag the control points to move them. |
 |
| Alternatively, there are 3 predefined shapes
that can be changed in the Hydrostatic panel. Double-click on
the Cockpit Shape entry, and select from A, B, or C. |
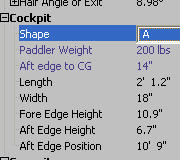 |
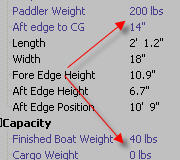
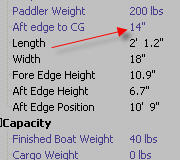
| In the Hydrostatic panel, you can alter the estimated
paddler weight, cargo weight, and kayak weight. Double-click
on each entry to edit the value. A reasonable kayak weight is
40-45 lbs for this kayak. Change the paddler and cargo weight
values to reflect the most common expected load for the kayak.
These individual weights combine to form the target displacement. |
 |
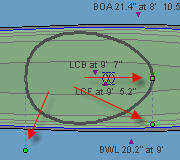
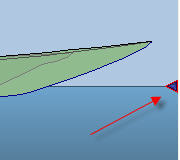
| Click in the Profile panel, and then click on
the triangular control on the far right on the waterline. The
control will be highlighted in red. When selected, the up/down
arrows make fine adjustments to the design waterline (DWL).
Move the DWL up or down until the design displacement (the displacement
of the underwater portion of the hull) is approximately equal
to the target displacement (the combined weight of kayak, paddler
and cargo). This adjustment causes the kayak's center of buoyancy
(CB) to be re-computed then and the center of gravity (CG) shifted
to be directly over the CB. In other words, the program shifts
the cockpit so that the overall CG remains directly over the
CB. This ensures that the kayak will maintain the designed trim
when loaded to the target displacement. |
 |
| In the Hydrostatic panel, you can alter the distance
of the paddler's CG to the aft edge of the cockpit. The default
value of 14" is a good estimate for most paddlers. If you
want to find your own CG, sit on the floor with your legs straight
out in front of you. Push down on the floor with your hands
on either side of your legs until you find the point lift yourself
off the floor (legs still straight out) and your body is balanced.
Measure the horizontal distance from your hands on the small
of your back. Alternatively (and easier if you've got the ingredients),
set a 2x6 plank over a dowel (or broomstick) like a teeter-totter,
sit on the plank and position yourself to where you're balanced,
then measure the distance from the dowel to the small of your
back. Either way you arrive at the distance, add to this value
any space you'd like between your back and the aft edge of the
cockpit (typically, I add 4", but that's just my preference).
Enter the total into the cockpit setting for "Aft edge
to CG". |
 |
Forms Setup
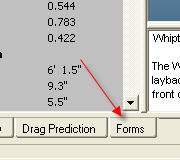
| Once you've completed any customizations to the
design (if any), you're almost ready to print the forms. At
the bottom of the main program window, select the tab marked
"Forms". This window will show you how the forms will
be printed relative to each other. The grid provides a rough
indication of how the forms will print on 8-1/2" x 11"
sheets of paper. KayakFoundry will print on any size of paper
that you choose, so just use the grid as a guideline. Before
printing, there are a couple options to consider. |
 |
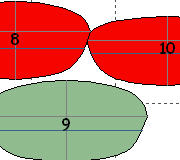
| If any of the forms are shown in red, this indicates
an overlap, and in general, it's best to print without overlap.
Click and drag the forms to arrange them on the canvas until
there are no overlaps. |
 |
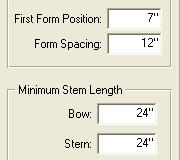
| You can also change the form spacing and starting
form position if you like, but this should not be necessary.
The forms are already setup for 12" spacing, which is typical.
Also, the length of the stem forms can be adjusted, but the
minimum of 2 ft is generally long enough. |
 |
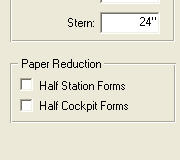
| If you want to conserve paper, you can consider
printing half-forms. This requires you to trace the form outline
(and significant reference lines) on to your form material (e.g.,
plywood), flip the paper over the centerline and trace the other
half. It's a little tedious, but if you want to conserve paper,
its an option. After selecting one or both of the half-form
checkboxes, you'll need to reposition the forms to place them
as close as possible. |
 |
| A word about positioning forms: While holding
the left click on a form, you can use the left/right arrow keys
to rotate the form. Simultaneously holding the shift key makes
the rotation snap to 45-degree increments. If you're printing
half-forms, you can rotate every other form 180 degrees so you
can place 2 forms centerlines close to each other. |
 |
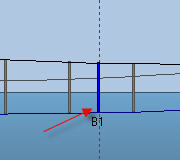
| There are two bulkhead forms pre-defined and
are named B1 and B2. If you intend to install bulkheads, you
may need to reposition them depending on the cockpit movement
due to customizations. The bulkheads on the profile view can
be click-dragged to position. If you don't need bulkheads, you
can just drag them off the end of the design to remove them.
Even if you do build the bulkheads, you can print those forms
later (generally the bulkheads are installed near the end of
the project). |
 |
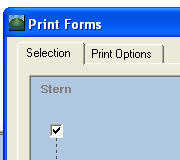
| Select File|Print
Forms to open the Print Forms dialog. There are two tabs on this
dialog - Selection and Print Options. The Selection tab allows
you to choose which forms you want to print. You can choose to
print 1, some, or all the forms at once. Some people choose to
print one form at a time to make the taping-together process a
little simpler. Each page will have corner registration marks
to help align them properly, but it can be a little unwieldy when
all forms are printed together. It helps to have a large worksurface
if you go this route. Here's the result. |
 |
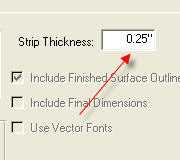
| Before printing, take a look at the Print Options
tab. Most of the options are self-explanatory, but I'll mention
a couple of the significant ones. The Strip Thickness is set to
1/4" by default. Most builders use 1/4" strips, but
if you choose to use thinner strips, specify the actual thickness
here. This will ensure that the form outline is adjusted to account
for the strip thickness. |
 |
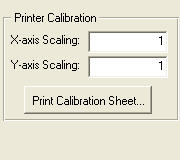
| The Printer Calibration allows you to fine-tune
the scaling in case your printer doesn't print accurately sized
forms. Normally, the default settings work just fine. |
 |
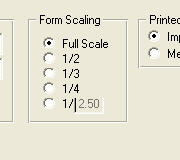
| The Form Scaling lets you print smaller forms if
you want to build a model. |
 |
| Click back to the Selection tab, and click the
white square button in the lower left. This clears all the checkboxes.
Even if you plan to print all the forms together, it's always
a good idea to print a single form to evaluate the result. Choose
one of the larger forms near the center of the kayak to ensure
that you print a multiple-sheet form (to get a feel for how the
pages are assembled). Click the checkbox to select the form for
printing. |
 |
Now... click Print. This will open the standard Windows
Print Dialog. Select your printer, and then be certain to specify
the correct paper size that you're using. The selected paper size
is reported to KayakFoundry, which allows it to maximize the use of
the printable area on the paper.
Once you are satisfied with the results of printing
one of the forms, you're ready to print the rest. You can choose to
print them all at once, or one at a time (by clearing all checkboxes
but one before clicking on the Print button). Use the registration
marks at the corners of the pages to align the pages properly. The
legend at the top of the page indicates the page and its position
in relation to others in the print sequence.
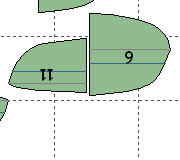
The forms are printed with outer dashed line that represents
the finished kayak surface, and a bold solid line that is the form
edge. Cut all forms out on the solid line. This can be seen on this
sample form.
Finally, cut out the forms and glue them to your form
material (plywood, particle board, MDF, etc.). I've found that 3M
77 spray adhesive works well for this. Cut out the forms and start
your project!
|