The Next One ...
-
COPPERPOINT

- Posts: 309
- Joined: Mon Mar 02, 2009 10:53 am
- Real Name: Rich
- Kayaks: Scrap or 2 (Great Auk)
- Location: Disneyland, California
-
Griffin800
- Posts: 933
- Joined: Sun Apr 19, 2009 1:40 am
- Location: Illinois
too many clamps
Sure you can have too many clamps, specially right after you move and they are stuffed into several boxes <g>.
Bill H.
Bill H.

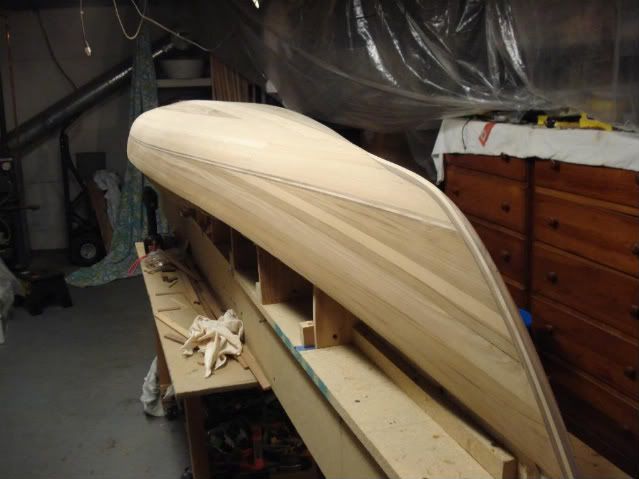
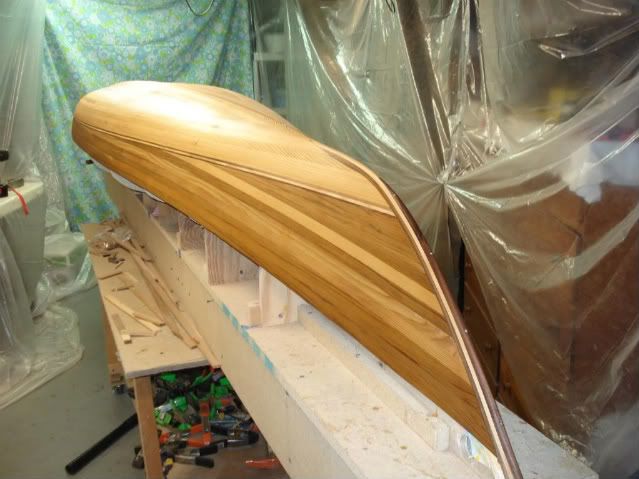
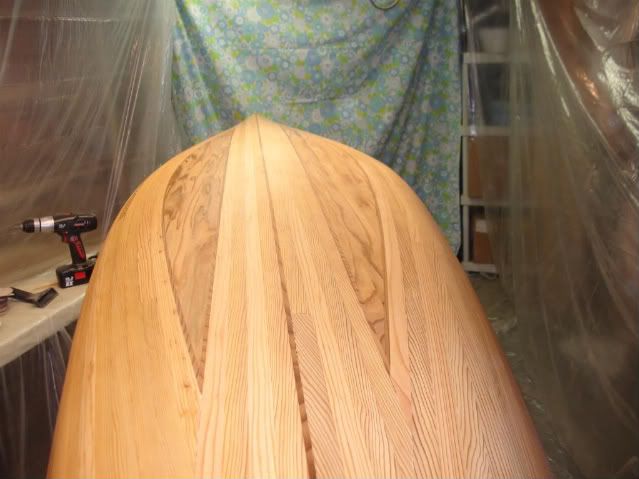
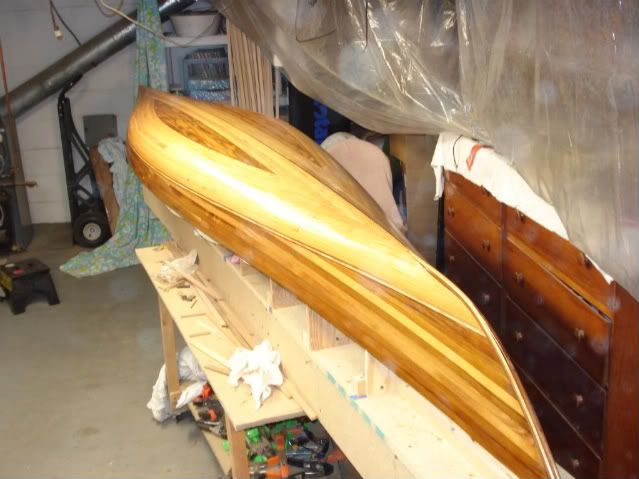
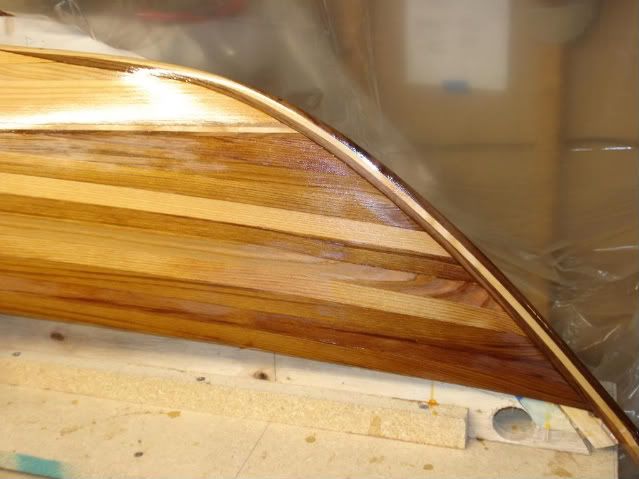
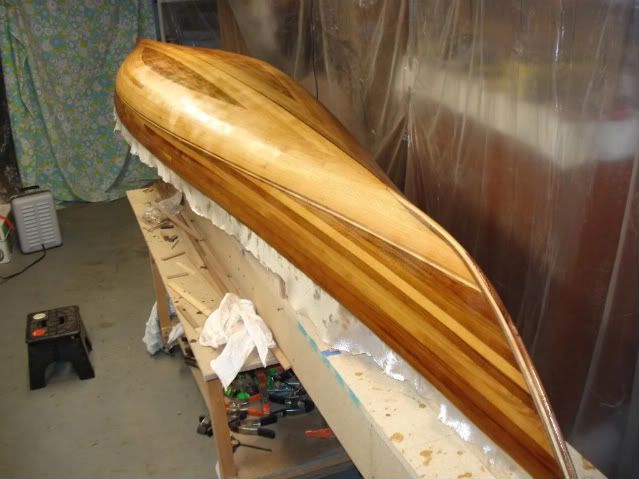
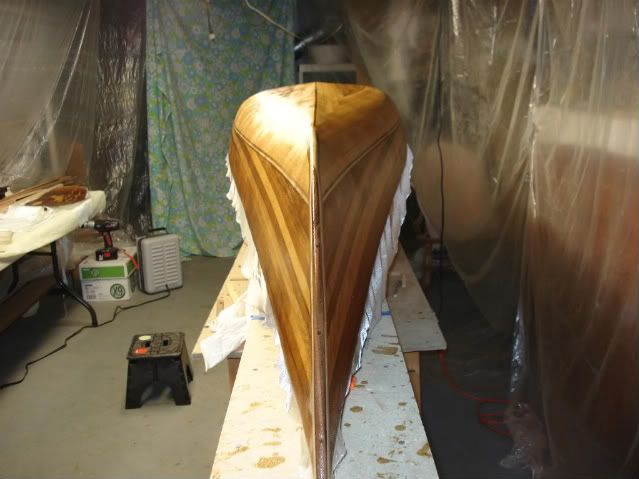
Finished stripping the hull tonight.
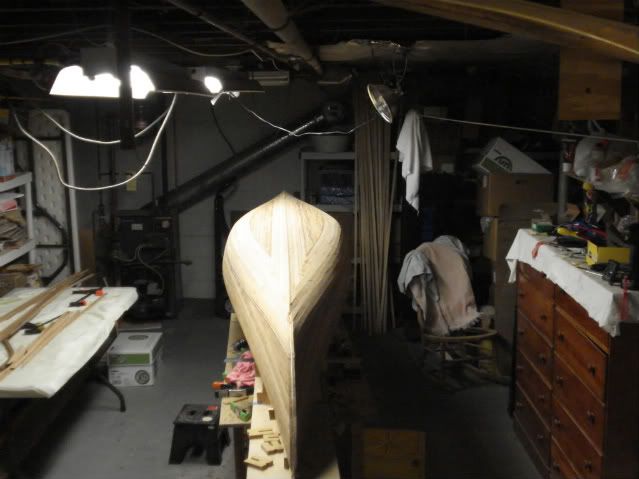
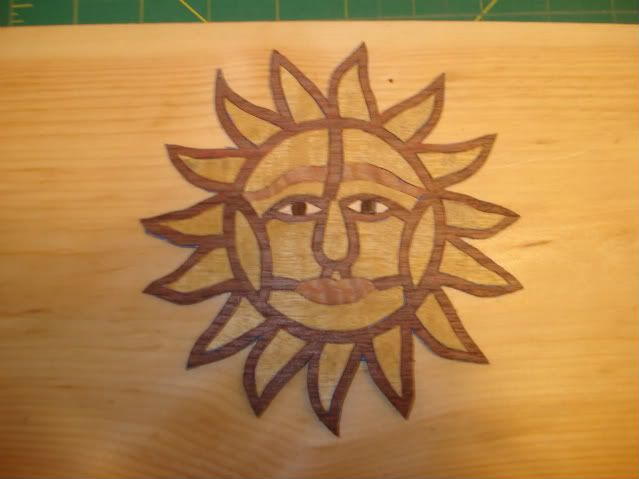
Now I ran out of the lighter WRC strips so I lined the opening with some thin strips of dark WRC and filled it in with some dark strips that have some interesting grain pattern. They should look pretty cool glassed.
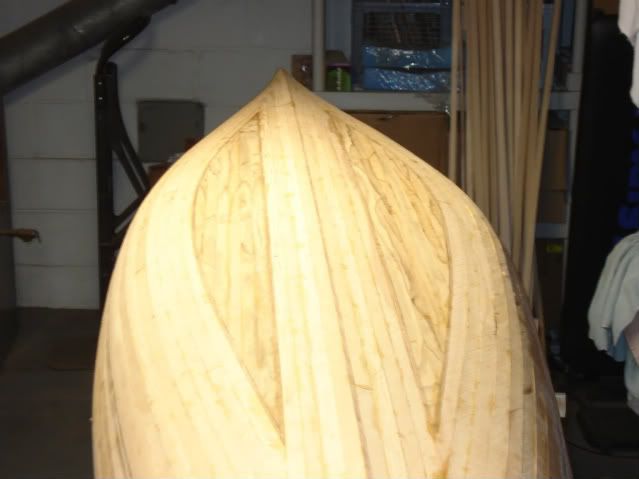

Hope to get the external stems on this weekend and start fairing the hull.
Now I ran out of the lighter WRC strips so I lined the opening with some thin strips of dark WRC and filled it in with some dark strips that have some interesting grain pattern. They should look pretty cool glassed.
Hope to get the external stems on this weekend and start fairing the hull.
"If you can dream it, you can do it." - Walt Disney
-
Ross Leidy

- Site Admin
- Posts: 829
- Joined: Sat Jan 20, 2007 6:49 pm
- Real Name: Ross
- Kayaks: Whiptail, Guillemot, Panache, Sitka
- Location: Cleveland, Ohio
- Contact:
-
stumpy

- Posts: 1138
- Joined: Wed Dec 31, 2008 12:20 am
- Real Name: David Mills
- Kayaks: skin boats, and pelican rec/WW
- Location: Staten Island, NY
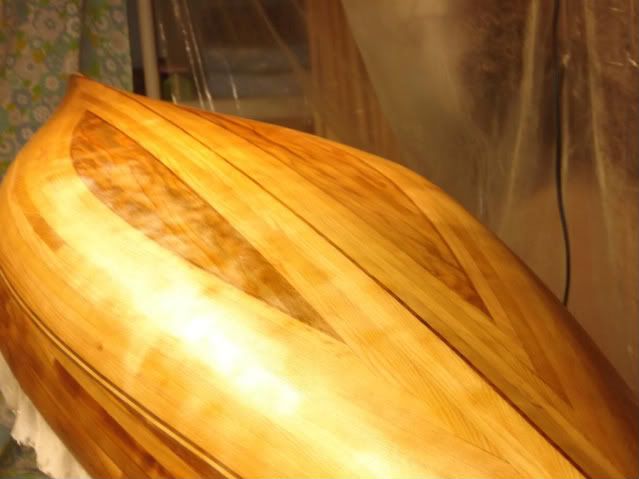
Beautiful job, Nancy! That Interesting Grain pattern is known as "spalting", which is fairly rare in cedar, more common in maple and birch, and is caused by moisture and trace infusion of minerals in the drying process... much sought after in furniture veneers for the uniqueness of the spalted patterns.
Can't wait to see what you do on the deck!
Can't wait to see what you do on the deck!
David Mills
Staten Island, NY
Staten Island, NY
David - Thanks for the explanation on the reasons for the grain pattern. The board looked the same as the others until I started ripping strips. Should look interesting when glassed.
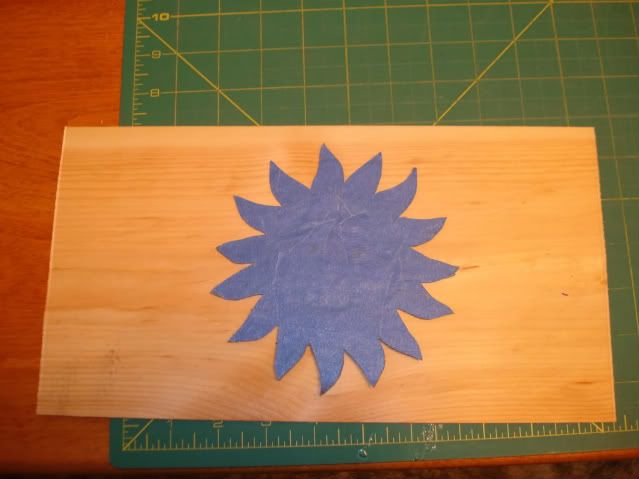
Not much time to work on the hull this week but I am still having fun with the veneer. I finished an onlay for the deck this week.
Set on a piece of pine veneer to see how it will look on the white cedar deck. This is the side that will be glued to the deck.
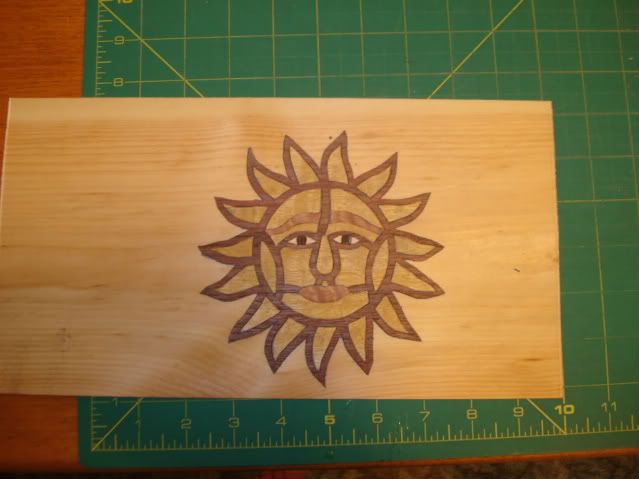
Blue masking tape holding everything together. Hope it will look OK when I peel it all off.
Not much time to work on the hull this week but I am still having fun with the veneer. I finished an onlay for the deck this week.
Set on a piece of pine veneer to see how it will look on the white cedar deck. This is the side that will be glued to the deck.
Blue masking tape holding everything together. Hope it will look OK when I peel it all off.
"If you can dream it, you can do it." - Walt Disney
-
COPPERPOINT
- Posts: 309
- Joined: Mon Mar 02, 2009 10:53 am
- Real Name: Rich
- Kayaks: Scrap or 2 (Great Auk)
- Location: Disneyland, California
Very nice Nancy. That looks like the kind of thing that will motivate you to get the deck finished. I'm at a similar point on my own boat. How thick is the veneer you are using? What tools are you using to cut it out?
I can't wait to see the hull glassed. That red cedar should look spectacular.
Rich
I can't wait to see the hull glassed. That red cedar should look spectacular.
Rich
Thanks Rich. It's been a lot of fun planning the deck design and working with the veneer. I bough a variety pack at a local Woodcraft store. http://www.woodcraft.com/Product/200575 ... -Pack.aspx
The thickness varies some with the species and is not specified on the package, but I would say it is all 1mm or less. The blue tape before cutting is a tip from George K on the CLC Forum. Check out pictures of his work on this post.
http://www.clcboats.com/forum/clcforum/thread/8820.html
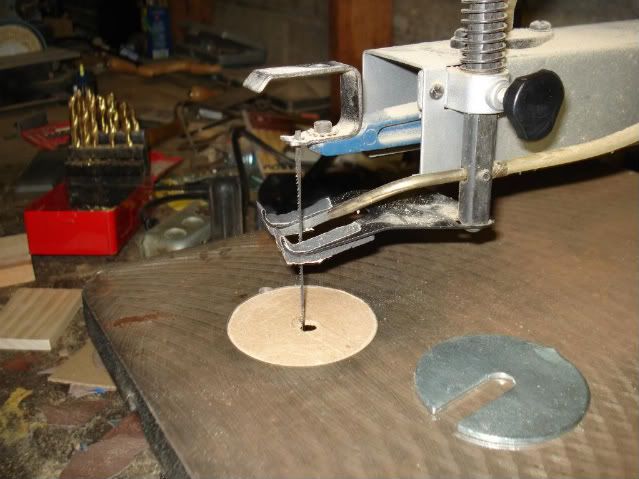
Some of the pieces on the bulkhead I cut on my scroll saw. It is not a vaiable speed so I was getting too much breakage on the small pieces for the sun. That was cut mostly by hand with an X-acto knife or scissors.
The thickness varies some with the species and is not specified on the package, but I would say it is all 1mm or less. The blue tape before cutting is a tip from George K on the CLC Forum. Check out pictures of his work on this post.
http://www.clcboats.com/forum/clcforum/thread/8820.html
Some of the pieces on the bulkhead I cut on my scroll saw. It is not a vaiable speed so I was getting too much breakage on the small pieces for the sun. That was cut mostly by hand with an X-acto knife or scissors.
"If you can dream it, you can do it." - Walt Disney
-
stumpy
- Posts: 1138
- Joined: Wed Dec 31, 2008 12:20 am
- Real Name: David Mills
- Kayaks: skin boats, and pelican rec/WW
- Location: Staten Island, NY
Breakage on the scroll saw will be lessened, Nancy, if you run a piece of scrap 1/4" plywood, the size of the scrool saw table, halfway through the saw, making a zero gap auxillary table, then tape that to your scroll saw table. It won't cure all those problems, but it will help.
I bought a new sheetrock knife the other day, with twin blades, and am now trying to figure out how to bypass the safety that prevents you from extending both blades at the same time, so I can cut strips with it, that look like 1/4" wide. It's made by Bostich, and seems to be pretty well made, but is really designed for two different types of blades- one straight, and one hook-blade, but it would be really cool to be able to use it to cut nice even width strips... besides, it looks really cool, and it's taxi yellow and black, so it matches my tape measure... how could I resist? So what if I now have 8 times more knives than I have hands?
Love the inlay, Nancy! I always watch your builds to see what you're going to come up with next!
David Mills
Staten Island, NY
Staten Island, NY
Thanks for the tip David. I did make a replacement plate with a smaller opening and taped some hatch gasket to the feet to hold everything snugger to the table. It hepled some. I'll try the plywood when I work on my next piece.
Good luck with the knife. Sounds like a neat idea for cutting veneer strips. If you can not make it work, you might try to find a way to connect a couple of rotary fabric cutters. Back to back they should cut a strip about 3/8" wide. These are different sizes but you get the idea. Yellow and black too!
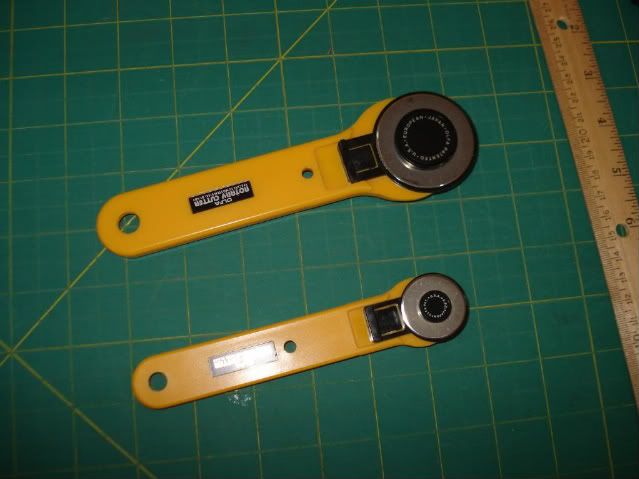

Good luck with the knife. Sounds like a neat idea for cutting veneer strips. If you can not make it work, you might try to find a way to connect a couple of rotary fabric cutters. Back to back they should cut a strip about 3/8" wide. These are different sizes but you get the idea. Yellow and black too!
"If you can dream it, you can do it." - Walt Disney
-
stumpy
- Posts: 1138
- Joined: Wed Dec 31, 2008 12:20 am
- Real Name: David Mills
- Kayaks: skin boats, and pelican rec/WW
- Location: Staten Island, NY
Great idea, Nancy! They already know me by name at the local JoAnn, and, even if I do get the new knife working, this could give me another size strip!
I have a design for a stripper, but really want to wait 'til I can find a supplier of paulownia, before I go ahead with the build... I know they're out there...
I have a design for a stripper, but really want to wait 'til I can find a supplier of paulownia, before I go ahead with the build... I know they're out there...
David Mills
Staten Island, NY
Staten Island, NY
-
defer

- Posts: 554
- Joined: Thu Sep 24, 2009 9:19 pm
- Real Name: Defer
- Kayaks: 3 kf yaks - yeti, her big sister, 2 sof - yost sea-pup, sea-cruiser
- Location: British Columbia, Canada
Hey David, if you do find a North American distributor of paulownia, pls do let us know. I like the light of the color pine/spruce I have available locally , but am frustrated with the pull-out. Random orbit sander works fine, but I sure enjoy the making quieter curlies using the block plane.
Have Fun !