Outer Island
| During the 1999 and 2000 Newfound Woodworks Rendezvous, I had the
opportunity to paddle Jay Babina's Outer Island kayak. I was a little intimidated by
the small ocean-style cockpit, but the shape of the craft was just stunning - I had to
give it a go. After that first paddle, I knew that I'd eventually have to build one.
To me, it had a blend of some of the best characteristics of both the Panache and
the Guillemot - strong tracking and shallow-arch hull like the Panache, and the
low-volume, curvy Greenland kayak lines similar to the Guillemot. This was one great
boat. I started construction in October of 2000. For a copy of the plans, contact Jay from the Outer Island website. |
|

Perhaps not specifically captured in the photographs, here's some of the things I did differently when building the Outer Island:
Stapleless construction - I just wanted to give it a try, but it turned out to be easier than I expected. I used hot glue to fasten the strips to the forms.
Bead-out stripping - With the bead out, it's much easier to clamp the strips, with no worrying about damaging the strip edge.
Less wood glue - Initially, I did this out of necessity to keep the wood strips from adhering to the bare wood forms due to excess glue. By being judicious in applying the glue, I was able to eliminate almost all glue squeeze-out, so there was virtually no cleanup necessary.
Less custom-tapered strip fitting - Using a technique described on the One Ocean Kayak website, I was able to drastically reduce the amount of fussing around with planing and custom fitting tapered strips.
Strongback with a work surface - I mounted the strongback on top of a 2'x16' OSB work surface which provided a great place to clutter with wood strips and tools.
Hull
 I was able to find some reasonably clear, creamy-white spruce
which I decided to use on the football of the hull. I hoped that the light color
would hide scratches better than the darker hulls of my other boats. I began the hull by assembling a spruce/redwood/spruce feature strip at the
sheerline followed by western red cedar up to the edge of the football area. I then
moved to the keel and ran spruce strips parallel to the keel, filling in the football.
I was able to find some reasonably clear, creamy-white spruce
which I decided to use on the football of the hull. I hoped that the light color
would hide scratches better than the darker hulls of my other boats. I began the hull by assembling a spruce/redwood/spruce feature strip at the
sheerline followed by western red cedar up to the edge of the football area. I then
moved to the keel and ran spruce strips parallel to the keel, filling in the football.
At the edge of the football, I placed a spruce/redwood boundary inlay strip. To make a uniform width inlay slot, I made this simple but effective marking gauge. An unopened box of glazier's points that I bought 8 years ago finally came in handy.
Deck
After glassing the exterior of the hull, I removed the form supports, removed the boat, mounted some cradles on top of the strongback, and returned the boat in its upright position. I used cradles instead of carpet slings because it allowed me to continue to use the work surface on either side of the strongback. The cradles really kept the boat stable while I was stripping the deck.
Deck Inlay
 After the deck was fully stripped, I cut a slot for the inlay, and began assembling a spruce/redwood inlay in-place. I used a load of
diamond-shaped strip pieces that I cut on the tablesaw. I used what I had available
- cove and bead strips. If I had to do it again, I'd opt for square-edged strips
which would allow me to see and fix gaps while fitting the pieces. The cove and bead
strips concealed some gaps in poorly fitted strips.
After the deck was fully stripped, I cut a slot for the inlay, and began assembling a spruce/redwood inlay in-place. I used a load of
diamond-shaped strip pieces that I cut on the tablesaw. I used what I had available
- cove and bead strips. If I had to do it again, I'd opt for square-edged strips
which would allow me to see and fix gaps while fitting the pieces. The cove and bead
strips concealed some gaps in poorly fitted strips.
Interior Fairing and Glassing
I usually dread the process of fairing the interior. While scraping-off the hot glue blobs with a cabinet scraper, I discovered that there was no need to drag out the sander. A properly tuned scraper is a joy to use, and I completed the fairing in a few evenings of very relaxing, very satisfying work. The only sanding I did was to rough-up the surface prior to glassing.
Compass Recess
 Jack Martin provided detailed descriptions and measurements of
the compass recess in his VCP Pintail, and I set out to
build one from wood. (Thanks, Jack!) I hadn't seen this done in a strip boat
before, so I thought I'd take the plunge and find out why.
Jack Martin provided detailed descriptions and measurements of
the compass recess in his VCP Pintail, and I set out to
build one from wood. (Thanks, Jack!) I hadn't seen this done in a strip boat
before, so I thought I'd take the plunge and find out why.
Cockpit
I used individual strips to construct the vertical part of the coaming. I built the lip from laminations of carbon cloth using the techniques described on the One Ocean Kayak website. This will yield a lower-profile coaming than on my other boats where I used laminated ash for the coaming lip.
Hatches
In keeping with the curved inlay, I thought oval hatches would be appropriate. I made flush hatch covers with composite hatch lips using the method shown on the One Ocean Kayak website.
Deck Fittings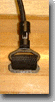
I spent quite a bit of time playing with ideas for deck fittings. I finally decided on a fitting designed by Joe Greenley of Redfish Kayaks. It's a simple, light fitting that consists of a loop of nylon webbing that protrudes through an epoxy plug in the deck. The loops are inserted from the underside and are held in place with some sealant (which makes it waterproof as well). The fittings can be removed when varnishing the boat.
Finished
 On June 16, 2001, I launch the Outer Island for
the first time. It still needed some outfitting, but it was complete enough for a
test paddle. It was just how I remembered - strong tracking, responsive to leaned
turns, and fast with a nice glide. Finished weight (including footbraces, seat,
backband, compass, knee braces, lift toggles, and rigging) was 45 lbs.
On June 16, 2001, I launch the Outer Island for
the first time. It still needed some outfitting, but it was complete enough for a
test paddle. It was just how I remembered - strong tracking, responsive to leaned
turns, and fast with a nice glide. Finished weight (including footbraces, seat,
backband, compass, knee braces, lift toggles, and rigging) was 45 lbs.
Thanks to Jay Babina for a wonderful design and fun project.